EDIT: I am collecting some detailed information about the project here: http://www.francescobonomi.it/photo-balloon
Dear friends,
a few months ago dcshrum wrote this post about a CHDK camera on a balloon:
Space Balloon
I have helped him and Will with the programming of the camera.
On dec 30th Donny and Will launched the balloon in Florida and the mission was a great success.
(I am in Italy, so I could only participate remotely, by programming the camera 😀
The balloon went up to 109.000 ft (33.2 Km) and as expected it burst, releasing the payload that returned safely to earth with a small parachute signalling its position. More info at icbnn.wordpress.com.
Some samples of the photos we were able to obtain (click to zoom):
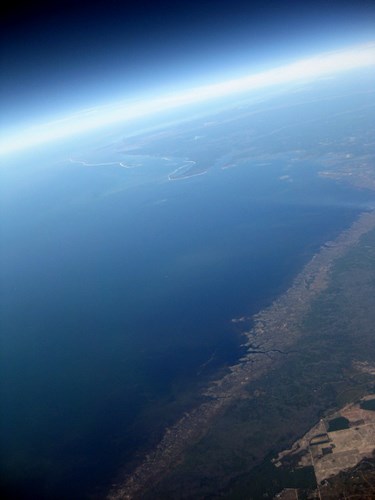
Shortly after the launch, looking over the coast of Florida, with the bay of Ochlocknee in the background
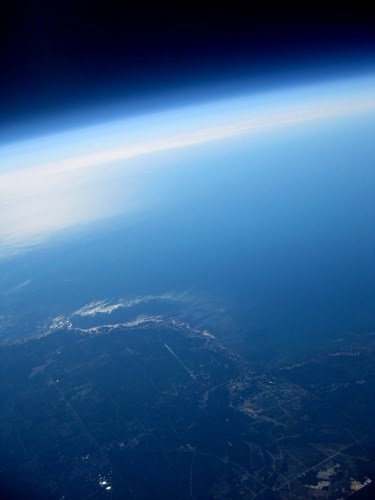
From a higher altitude. You can see a jet far below the balloon
At the maximum altitude. In effects, this photo was taken just after burst, and you can see small fragments of the balloon
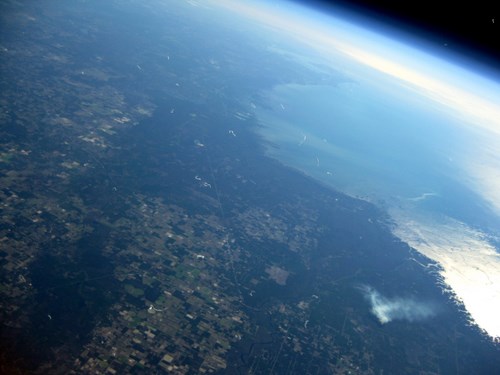
At these altitude, we are almost at the end of our atmosphere: with a pressure approximately equivalent to 1% of the surface pressure, and temperatures of about 40-60° below zero, the situation is nearer to being on Mars than on the Earth. The sky is black, as almost all air is below us. It's like as if the balloon "floats" on top of our air.
Just to give an example of the extreme conditions the camera underwent, during the descent phase the air was so cold (and the air flow was so strong) that the temperature readings from the internal sensors went down to -8° (CCD and optics) and +4° (battery). It's amazing that the camera kept working (even though the battery life was only of 2h 41m)
We were able to take over 1500 photos and three videos (one at launch and two at high altitude), you can see them at icbnn.wordpress.com
The on-board camera was an
Ixus 80 /
SD1100. From the CHDK perspective, I managed to somehow switch via script from video to photo mode and I programmed it rather heavily, mainly to have the desired type of photos (few photos during the ascent, a lot of photos at high altitude.
This wouldn't be possible without CHDK, that was used to obtain some important results:
1) switch from video to photo mode
2) disable the ND filter of the
SD1100 (at high luminosities, the ND filter activates, exposure time increases and images are blurred)
3) implement a "Fast TV" mode: fix an exposure time (for example, 1/2000 sec) and (within certain limits) adjust ISO accordingly. This was needed because the camera has no iris, and no Tv mode
4) develop a "dark sky" metering: on previous similar missions, many high-altitude photos were over-exposed because the camera, while swinging, would start metering while pointing at the dark sky and shoot when looking at the bright earth. In this metering mode (only activated at high altitudes) I take a large number (100) of meterings, discard the 50% darkest ones (presumably the ones pointing at the sky), discard the 10% brightest ones (for example, the ones pointing at the sun) and average the remaining ones. This metering would then be used for a series of shots taken at short intervals.
CHDK made the mission an absolute success from the photographic point of view: generally in these mission less than half of the photos are usable, the others are blurred, over-exposed, under-exposed etc. In our case almost all the phots were good!
I am now trying to assemble an immersive 360° panoramic view. You can see the first draft here:
http://francescobonomi.it/icbnn/medium.html (requires
devalvr plugin)
(much remains to be done, and the stitching is approximate, that's why the horizon is irregular)
In the next days I will post here the programs (that anyway contain parts of general interest) and discuss other data that I collected.
thanks to all the CHDK folks!